Instagram, Pinterest, Facebook, etc. all of these social media platforms encourage visually attractive & creative images. To tie your brand and blog to the images you post online, you may decide to create these pictures & photos yourself. When it comes to blogging though, there are a few pieces of photography equipment that can really help in taking your photos to the next level. In this post, we’re going to look at the best photography equipment for bloggers and how they make your pictures stand out from the crowd.

If you want to read this later, please save it to Pinterest.
Many people associate blogging with getting out your laptop and writing beautiful sentences that flow like the river Thames. Whilst sometimes this is true & you just find that flow and can’t stop writing, other times you find yourself doing the other aspects of blogging people don’t really talk that much about.
I’m talking about those things that make your posts pop, like adding images to your site & articles, making your email & newsletters eye-catching with the best graphics & posting regularly to social media sites like Instagram, Pinterest & even YouTube.
You have two options when it comes to using images in your posts.
- Using someone else’s photos by obtaining a license.
- Creating your own images.
For this post, we’re going to look at the 2nd option. With some practice & the right kit, you’ll begin to easily make images that stand out and give your blog a really unique look and feel.
First of all, I can’t emphasize enough how strongly I feel about taking advantage of what you already have.
You don’t need to go out buying brand new equipment and gear if you already have equipment that will get the job done. This is especially true if you’re new to blogging and to photography. If you have a compact camera or smartphone, use that & practice some of the fundamentals of what makes a good picture.
If you go to just about any channel on YouTube that discusses Photography tips, you’ll find a Gear doesn’t matter video somewhere.
Why? Because it’s true. Gear doesn’t automatically make better pictures. It all comes down to how you use the gear. What better equipment can do though, is make it easier capturing an image.
Moral of the story – If you have something that can substitute for some of the photography equipment below, go ahead and try it out. You’ll be shocked at what you can achieve!
With that being said, let’s get straight to what this post is about -> Photography equipment for bloggers
Best Cameras for Bloggers
The first thing you need in order to take a photo is a camera. As I’ve already mentioned, this doesn’t need to be the latest & greatest DSLR or mirrorless camera on the market. You could use your smartphone, a compact camera or a more affordable interchangeable lens camera.
If you’re looking to create some professional looking images at an affordable price, have a look at my guide to the 7 best cameras for bloggers under $500.
Most of these cameras feature an interchangeable lens, making them extremely versatile & for blogging that can be a massive advantage.
What am I currently using? Panasonic G7 & a Sony A7 II.
Best Camera Lens for Bloggers

If you decide on a mirrorless or DSLR camera, you’re going to need a lens or two. Which lenses you go for all depend on what type of camera system you’re using & what exactly you photograph for your blog.
If I had to recommend one lens though, it would have to be a nifty fifty.
This is a 50mm lens (or equivalent to 50mm if you’re using a camera with a crop factor) that has a wide aperture, and generally doesn’t cost an arm and a leg.
The bonus of a wide aperture, like f/1.8, is that you can get some great bokeh quite easily.
Bokeh? That’s the cool effect that you get where the background of your image is blurred whilst your subject remains in focus.
Best Tripod for Bloggers
A tripod is one of those things that most, myself included, overlook when they’re starting out and just get the cheapest tripod they can find as it’s just a tripod after all.
Whilst it’s true that any tripod is better than no tripod, a quality tripod from the get-go will save having to burn through numerous cheap tripods.
This is especially true if you’re on the go & take a lot of photos outside. We travel quite a bit and find that this tripod from Manfrotto provides just the right amount of durability, compactness & price point.
Best Overhead Mount for Bloggers
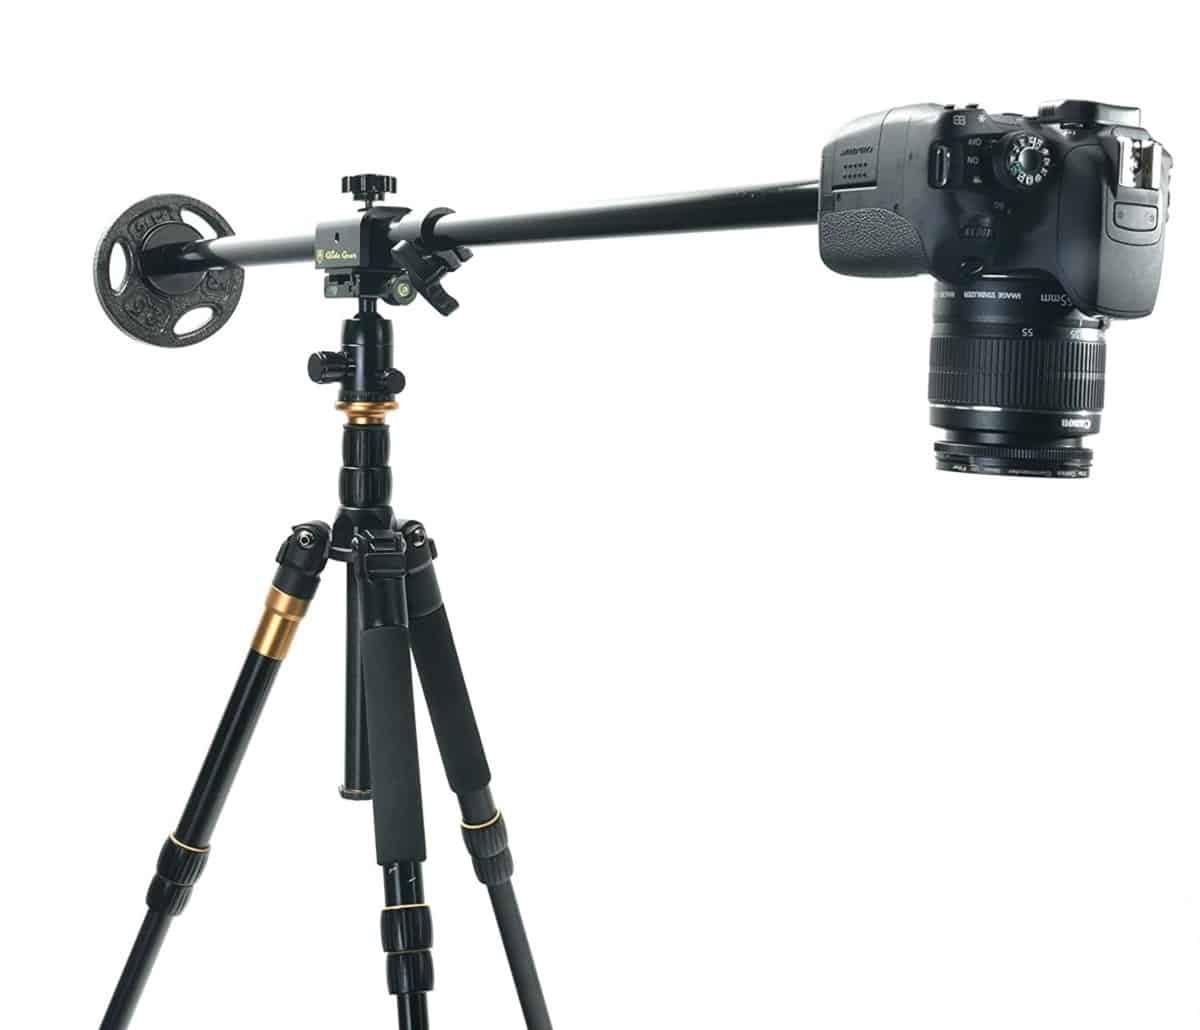
Ever wondered how bloggers get those awesome flat lay images with products & accessories scattered across a vintage wooden table? The easiest way is to use an overhead mount, like this one, on your tripod.
You’ll be able to take images directly above any products you may be reviewing, create seasonal flat lays as well as other flat lays for both your blog and social media. When it comes to flat lays, the options are endless.
Spice things up even further by getting a few flat lay backdrops. These give you the effect of having a vintage or white-washed table, without having to visit your local antique store. ?
Best Lighting Kit for Bloggers
Lighting up your images is by far the single most effective way to make your images look more professional.
Taking photos indoors can be tricky at the best of times, especially since the natural light is often very harsh during the day & is quite unreliable when the clouds roll in… and those lights you have built into your ceiling, just won’t cut it either!
A lighting kit, like this one, allows you to position and angle your light in a way that accentuates your subject. This kit in particular also comes with two soft-boxes that soften the light, giving it a much more pleasing appearance and reduces hard shadows in your images.
Best Diffuser and Reflector Kit for Bloggers

When it comes to lighting, natural lighting is pretty much always the best.
As I mentioned above though, it’s hardly something you can predict or control. This is why lighting kits are so important indoors. When it comes to outdoor use, however, reflectors can help you target that brilliant natural light right where you want it & illuminate your subject with some beautiful soft light.
That’s not to say that reflectors can’t be used indoors. They can be used to direct natural light through a room onto your subject or in combination with another light source, like a flash, to bring some light into your images.
If you’re looking for an indoor setup, a kit with a stand can provide the most versatile use. As for outdoors, portability is key, and a more compact set, like this one, fits the bill perfectly.
Best Camera Remote for Bloggers
A cabled or remote shutter release for your camera can be a massive time saver when you’re taking multiple photos or videos and your camera isn’t within arm’s reach. When creating flat lays, for example, a remote control allows you to simply set your composition underneath the lens & snap the shot. Rearrange a few things & snap again. Easily creating multiple flat-lays without having to constantly move behind your camera & make sure you didn’t nudge it out of position.
Speaking of nudging things, a shutter release is even more useful if you take a long exposure. Now, this may not be very important to you if you’re taking a lot of indoor images, but for travel, low-light or night time photography, a longer exposure means you can take more detailed images & incorporate some interesting lighting effects. The camera needs to stay completely still for this, as even the slightest wobble of releasing the shutter button can introduce some blur into your pictures.
P.s. Many cameras that connect over Wi-Fi or Bluetooth have a mobile app. You can use the remote shutter function to then control your camera via your smartphone.
Best of all: Use what you already have
Whilst all this photography equipment can really help you take better images for your blog, having a look around your home and thinking a little bit outside of the box might be able to save you some cash whilst still being able to take some pretty awesome images.
Use your smartphone, improvise with white cardboard & duct tape to create a reflector and a tripod. Use a mobile app to control your camera, etc. Start off small or invest in one item to get yourself going. And like everything when it comes to blogging, just keep practicing and you’ll improve in no time!

As usual, if you have any questions about any of the gear mentioned, drop them in the comments below & I’ll do my best to answer them. ?
If you’ve enjoyed this post and found it helpful, I’d appreciate it if you share it with someone that will also find it helpful.

