In this step-by-step tutorial, we will cover everything you need to know to start a successful blog. We will be looking at getting set up, things you need to know, useful tools, how to start a blog and make money, and even how much it costs to run a blog.
This guide covers the A-Z of starting a blog; if you’ve already gotten the ball rolling, feel free to skip ahead below.
Contents:
Find Your Blog Niche
The first thing you need to consider is your blog niche. This is the main topic that your blog is going to be focused on. It can be a specific niche, like kettlebell weight loss or something as broad as fitness.
By having a niche, you give your website structure. You also provide an incentive for readers to follow your blog, as they then know what benefit you are providing them with & what they can expect.
You can decide on a niche by considering these 4 questions.
- Do you have any passions?
- What can’t you stop talking about?
- Can you come up with 3+ subtopics for any of the niches from the first 2 answers?
- Are others interested in this topic?
Choose a topic you cannot shut up about and can come up with at least three subtopics. Even if you have more than 3, your readers will later help you decide which subtopics are best for your particular blog.
Consider Blog Monetization
Certain types of blog posts can work best for certain types of monetization methods. By clearly knowing how you want to monetize your blog, you will have more direction in the type of blog posts that you should be writing.
For example, blogs that review certain products are great for affiliate income, as people who click on these types of articles are already interested in making a purchase.
Detailed guides explaining the benefits of a service that you provide, on the other hand, are more useful for monetizing your blog through selling your own services like photography, for example.
If your main monetization method is planned to be through ads, then you should focus on creating posts that drive a lot of traffic. These could be covering trending topics in your specific niche or creating posts that generate a lot of shares on social media. For example, an easy recipe hack.
There are many ways to monetize your blog, but for new bloggers, these are the three ways that I recommend you start with:
Affiliate Marketing
This is recommending products to your audience, and in return, you earn a commission. Your readers do not pay anything extra, and sometimes you can even offer them a special discount so they actually save money on their purchases.
It is important that you disclose affiliate relationships in posts, and only include products that you have used and would recommend regardless.
Display Ads
This type of revenue is the easiest once you have everything set up. Whenever someone visits your site or clicks on an ad, you earn a little bit of cash.
When starting out, you won’t have much traffic, so you may only earn a few cents or a few dollars, but once the traffic increases and you can apply to a premium ad network like Ezoic, Mediavine, or Raptive, your income will increase quite impressively as well.
Services
For new full-time bloggers, selling services on your blog and through freelance sites like Upwork can be a great way to make ends meet while your traffic grows.
You don’t even need to be an expert in order to sell your services, there are many online jobs you can do remotely that require little to no specialized skills, such as data entry, or being a virtual assistant.
Find Your Content Pillars
Content pillars are the main articles of your blog. The blog posts provide the most value and provide the most insight into your niche.
These are most often definitive guides, best-of lists, comprehensive tutorials, etc.
The content pillars of your blog are the central hubs that have everything you need to know, and then your “regular” posts can go into further detail on individual aspects.
Pillar posts are important to define at this stage already because they should appear prominently across your blog and on your home page. These posts should also be internally linked to all relevant articles.
For example, a pillar post for a fashion blog could be “Men’s Spring Fashion 2024”. This would be a definitive guide that covers everything you need to know about men’s fashion in the spring of 2024, with links to posts that cover men’s shoes, formal wear, etc.
These more specific articles would also link back to the main pillar post as the definitive guide that covers everything you need to know, thereby sharing page rank authority with each other (Which we cover in more detail in the backlink and SEO section coming soon below).
For now, it’s important to think about what the main content pillars of your blog will be.
Make a Visual Sitemap
A sitemap is simply a mapping out of your blog, most often used by search engines to crawl your website and find new pages and posts.
This is not what we are referring to here, though.
This step is all about deciding on hierarchy, what pages you may need, and what you’re going to include in your blog menus.
By doing this now, when you start your blog, there will be a clear plan in place and your priorities will be set out.
Having a plan and setting priorities is the fastest way to have a money-making blog.
Your visual sitemap can be a very simple one like the one below, highlighting your main pages and categories. It can, however, also go into more depth with your pillar posts and even define the specific content you wish to include on each individual page.
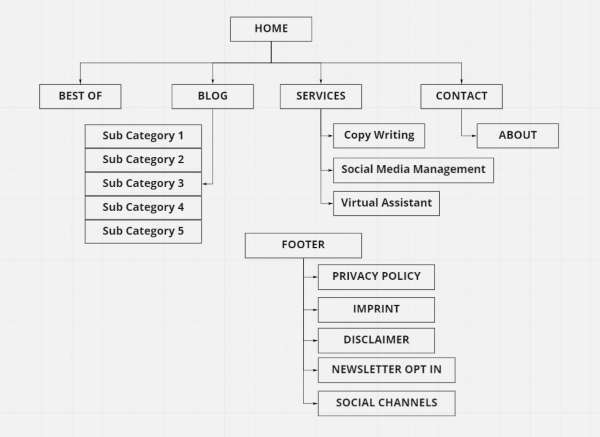
I like to use Miro for this; it’s free and is a great tool for visualizing all forms of planning and funnels. There are many other Miro alternatives you can use, or just grab a pen and paper.
Create a Basic Wireframe For Your Home Page
This step is there to help you avoid distractions when starting your blog.
Focus on the absolute necessities and prioritize the aspects of your blog that matter the most (what’s on your pages).
A wireframe is a simple visual layout of how your pages should look; in this case, it’s your blog’s home page.
Starting with a wireframe will help you choose a theme that suits your needs.
This helps you avoid the trap of choosing a theme purely because it has a million features that you think you may need, but actually don’t, and will generally just slow your website down anyway.
Your home page wireframe should include where your main pillar posts will appear, how your menu should appear, a layout of your home page with a call to action (what should people do when they visit your home page? I.e., go to an awesome article, visit your services, or join your newsletter/email list).
This does not have to look fancy, you can use Miro again for this, or you can do what I prefer, and that’s sketch something on a piece of paper, like the image below.

Get Hosting and a Domain Name
The next step starts off with deciding on your blog’s name and the domain name.
Your domain name is your website URL, I.e. yourwebsite.com. If you can’t get a .com for your blog name, then you may want to consider changing the name. The new extensions, like .online, etc., are still not as commonplace, and people tend to automatically assume it’s a .com.
As you want to start a blog, you’ve probably already put some thought into your niche and your blog name.
Next, we are going to look at hosting your blog. Think of hosting as renting space on the internet for your blog. Here, all your data, images, blog posts, etc., are stored, and it allows people all over the world to access it through a unique website address: Your domain name.
To set up your hosting and get WordPress installed, I’ve put together a comprehensive video tutorial that also covers designing your website and everything else you need to know.
Resources and links mentioned in the video:
- GreenGeeks
- GeneratePress Premium
- GenerateBlocks Pro
- ShortPixel Image Optimizer
- Canva
- ChatGPT
- Google Analytics
- Google Search Console
- Gmail
- Miro
- LinkWhisper
- ConvertBox
- Affi.AI
- WP Rocket
- Additional CSS Code
WordPress Overview
Now that you’re here, I will give you a little overview of WordPress.
The top bar has a group of shortcuts on the left. These can be used to visit your site and add a new page or post. On the right-hand side of the top bar, you can edit your profile or log out.
The column on the left is where you manage your site:
- Posts: You can add and manage your blog posts and categories here.
- Pages: These are static pages you can create for your home, such as about, contact, etc. You can connect these to your navigation bars and menus.
- Comments: Here, you can approve, delete, and reply to comments on your blog.
- Appearance: This is where you can edit the appearance of your site. You can do this by customizing or changing your theme, adding widgets, and changing your menus.
- Plugins: You can think of these as 3rd party apps that you can add to your website to improve functionality, appearance, and much more.
- Settings: You can change many site settings here; one of the first I recommend changing for bloggers is the permalink. By default, it will show the date of your post in the URL. To keep your content evergreen, I always change the permalink option only to show the post name.
Now WordPress may seem daunting at first, but once you’ve gotten used to where everything is and what it does, using WordPress will become second nature.
There is plenty more that you can do with WordPress, far too much for me to include it all here. If you’re looking to learn a little bit more about WordPress, I recommend going through the WordPress Lessons archive.
Design a Logo For Your Blog
One of the next things you may be wondering about would be branding.
Does a blog need branding from the get-go? No, it doesn’t. But by setting up some basics your site will look better & readers will start to associate certain colors, patterns & pictures to your blog.
You are going to need a logo, however. It doesn’t have to be something fancy. You can easily put something together even if you’re not a graphic designer. Your logo can be quite simple, I.e. the name of your blog in a readable font. Or if you have the time & expertise, it can be something much more elaborate.
Some useful tools or sites for creating a logo can be found here:
Canva
Canva is a favorite of many bloggers because of its free service, powerful tools & ease-of-use. It is a really intuitive platform and makes creating blogging graphics a walk in the park. The same can be said for creating some simple logos for your blog.
Adobe Photoshop or Illustrator
The Adobe range of software is not free & it is certainly not something that can be considered beginner-friendly. If you are experienced in image or photo editing, however, & you already happen to own Photoshop or Illustrator, these are by far the most powerful tools to create custom graphics for your site. That includes creating your logo.
Fiverr
If you do not have the time, patience, or creativity, you can always outsource the design work. Fiverr is a good place to find cheap logo designs. Shop around before you settle on a gig and check out the reviews that the seller has to make sure you’re dealing with a good reliable seller.
99Designs
Another option for outsourcing your designs & is most probably the option that will return the best designs. 99Designs is more expensive than Fiverr, but you tend to receive much higher quality work, both creatively and in your final design.
ChatGPT (Dalle)
AI is a great tool for creating captivating logos, all you need to do is tell the chat bot what type of logo you want and it will generate an image that you can then use as the final design or take it into an editing tool like Canva or Photoshop to tweak.
If you’re going to design your own logo, visit Canva and have a look at some of the other graphics options for bloggers. You can create awesome banners, sidebar images, blog post pictures & all sorts of graphics for your social media accounts.
Your First Blogging Steps
The last few steps are to put all of your ideas to work and start creating content. You should start off by creating the following:
About Us Page
This page is vital for when new readers to visit your blog.
A lot of the time if a reader lands on one of your posts when they’re done reading they’ll head over to your about page to get to know you a little better. This page allows you to tell them a little bit more about you, what you do, what your blog is about, and, most importantly, why they should follow along on your journey.
Don’t forget about your contact page including in a contact email or other way of getting in touch with you.
Legal pages
You’re going to need legal pages to disclose affiliate links, cookies, disclaimers, tracking, etc. It’s just one of the pains of blogging. Luckily you won’t have to spend too much time on them once they’re complete.
Legal pages can be tricky, which is why I recommend going directly to a professional lawyer, but one that happens to be a blogger and will have your best interests in mind (and doesn’t want to hit you hard in the pocket if you know what I mean).
Amira over at Aselfguru is who I recommend, she is a professional lawyer and blogger with a legal bundle that will have all your blog legal pages covered in one package (and at a very reasonable price).
Your First Blog Post
Your ‘about’ page is set up and you’ve gotten all of your legal pages set up as well? Then it’s about time you get started with your first blog post.
You can write an introduction post, letting the world know who you are and what you’re going to be doing. Or you can just get straight into writing about your niche and leave the introductory stuff to your about page.
Create your Social Media Accounts
Facebook, Instagram, Pinterest, YouTube, LinkedIn, TikTok, X (formerly Twitter), etc. whichever tickles your fancy.
Pick a social network that fits with your niche, I.e. Fitness is very popular on Pinterest. If you can create videos you can share them on YouTube, visual brands also do amazingly well on Instagram.
Whichever network you choose to go with put the majority of your effort into only one or two social media networks at first. Each network has its own way of promoting your content and you will have to invest some time getting to know each platform and how to create content specifically for each one.
Once you have gotten one of the social networks under control, you can start experimenting with another one.
I’ve put together some guides that will help you get started with my favorite (and some of the most lucrative) social networks:
- Beginners Guide to Instagram
- How to set up a YouTube Channel
- 35+ Advanced tips to grow your YouTube Channel
Useful Resources to Start a Blog
I am a firm believer in learning through doing and learning from your mistakes. One big problem arrives though when you consider how much your mistakes have cost you in time & money.
This is where blogging courses come in. Good ones teach you everything you need to know to avoid the big costly mistakes whilst showing you what to do in order to become a successful blogger.
I still believe in learning through doing, but your learning becomes a lot more efficient and effective with the correct guidance. Why learn from your own mistakes when you can learn from others?
Launch Your Blog Biz course
If you’re at the very beginning of your blogging journey and finding it tough getting started… Even though I’ve really tried to make your start as seamless as possible with this guide. I recommend the Launch Your Blog Biz course from Alex & Lauren at Create & Go. This course guides you through setting up your blog with WordPress, customizing themes, creating graphics, how to write blog posts, blogging fundamentals, building your list & many more useful & professional tips & tutorials. In addition to the blogging stuff, you’ll also learn how to monetize your blog through affiliate marketing, sales & email funnels, how to convert readers into buyers, using social media to get traffic to your posts & much more (here’s a detailed review).
If you want to get started making money with your blog, I highly recommend the course. You’ll probably even run into me in the private support group lending a hand.
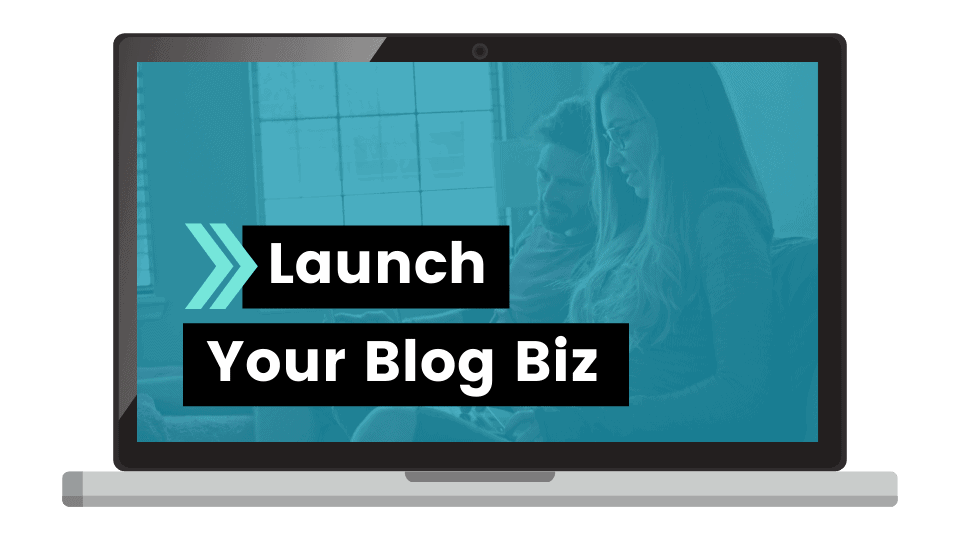
Find out more about the Launch Your Blog Biz here.
Mastering Pinterest Marketing
Mastering Pinterest Marketing is another course provided by Create and Go. This course is designed to increase your blog traffic through proven Pinterest traffic techniques. Pinterest is one of the best sources of traffic for blogs and this course teaches you how to create an incredible Pinterest account that will drive targeted traffic to your blog.
It is safe to say that I love the Create and Go courses, not just because of the content in the course, but the real-time updates and answers you get from the over 1000 members of their support groups.
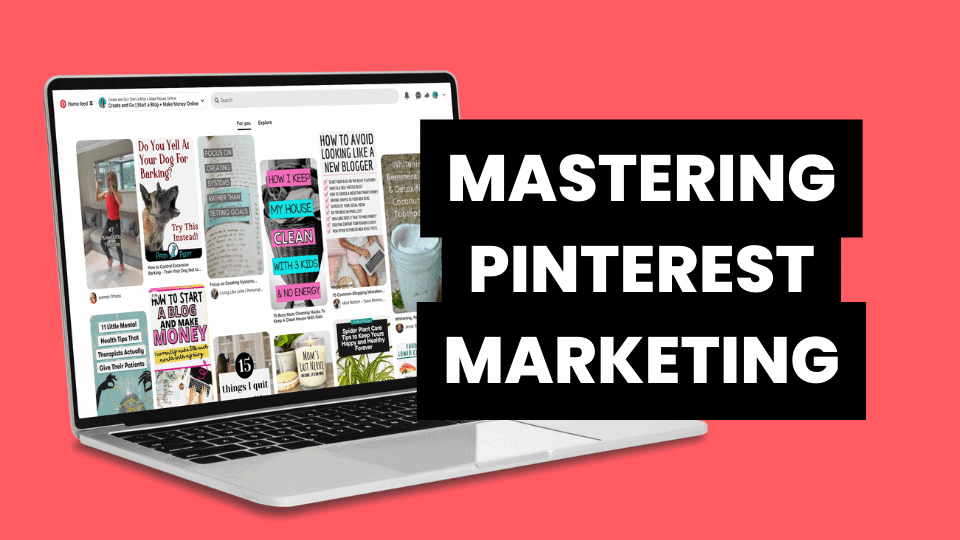
Find out more about Mastering Pinterest Marketing here.
Are any of these courses essential? Of course not, but they can all help you on your journey to starting a successful blog. I was apprehensive about taking courses myself, as the internet seems to be able to provide so much information for free, but eventually, I took the plunge & can safely say that it was money well spent. Why? Because these are bloggers that started out just like you or me and have since gone on to prove that what they teach you actually does work.
How Much does it cost to start a blog?
The simple answer is whatever you can afford. You don’t need a professional theme, paid plugins, or even to host your own domain. They make a huge difference in increasing the searchability and popularity of your blog, however. I’m yet to come across any full-time bloggers that have been successful without a good theme & self-hosted website (I.e. yourdomain.com instead of yourdomain.wordpress.com). This is because self-hosted sites allow you to install plug-ins, AdSense, etc. A lot of the features are not possible with free hosting sites.
Free
There’s nothing wrong with starting off with a free blog if you’re only looking to see if blogging is right for you or if your only goal is to share your experiences with family & friends. You can get started for free with Blogger, Wix, Weebly, etc. As Blogger is owned by Google, you’re able to use AdSense on your site, which isn’t normally possible without self-hosting.
Basic
If you don’t have much money to invest in your blog you can get started with the basics.
$2.95 per month for hosting + $59 for a theme. You can look through ThemeForest for a variety of different themes, you may even find a cheaper one that speaks to you.
Paid plugins, graphics & courses can be avoided for the time being, until you start gathering some momentum & making money with your blog. Look out for free resources, like Canva, to create your own graphics & logos.
Beyond…
If your blog is making a good amount of money, you can spend more on hosting for the increased traffic, better sales funnels, additional social media tools, paid advertising, expert contributors, etc. It really all comes down to what your blog can afford and what you feel you need.
As you’re reading this article, you are most likely just starting out on your blogging journey. Don’t worry too much about this last category, it’s only here to highlight that you can pay more for functionality or convenience once your blog is running successfully.
How much does it cost to start & run a blog? As you can see, whatever you can afford.

